Voice Cloning — Clone Your Voice for Your AI Agent
Written By Maruf Ansari
Last updated 2 days ago
Give your AI Agent a voice based on your own recording instead of choosing one from the Voice Library. This guide covers uploading an audio file or recording in the portal, adding voice details and selecting the cloned voice for your Agent.
Clone Your Voice Overview
Clone Voice allows Business users to create a custom AI Agent voice using an audio sample and select it in the Agent's Identity settings. You can upload an existing recording or record a new sample, provide the required voice details, and submit it for cloning. Once the voice is available, you can select it for your AI Agent and perform a controlled test to check the audio quality. Using a clear recording with minimal background noise, echo, or distortion helps achieve better voice quality.
Important notes
The Upload guidance recommends at least 1 minute of audio and says to avoid more than 3 minutes.
Creating a voice and selecting it for an Agent are separate tasks. Verify the selected voice before relying on it for live calls.
Before you start
Open the Agent you want to configure in the Business Portal.
For Upload, prepare an MP3 or WAV audio sample. Review the audio guidelines below.
For Record, have a working microphone and a quiet place to speak.
Use your own voice. Avoid including private Business information or other people's conversations in the sample.
Open Clone Your Voice
In your Agent, open Configure → Identity.
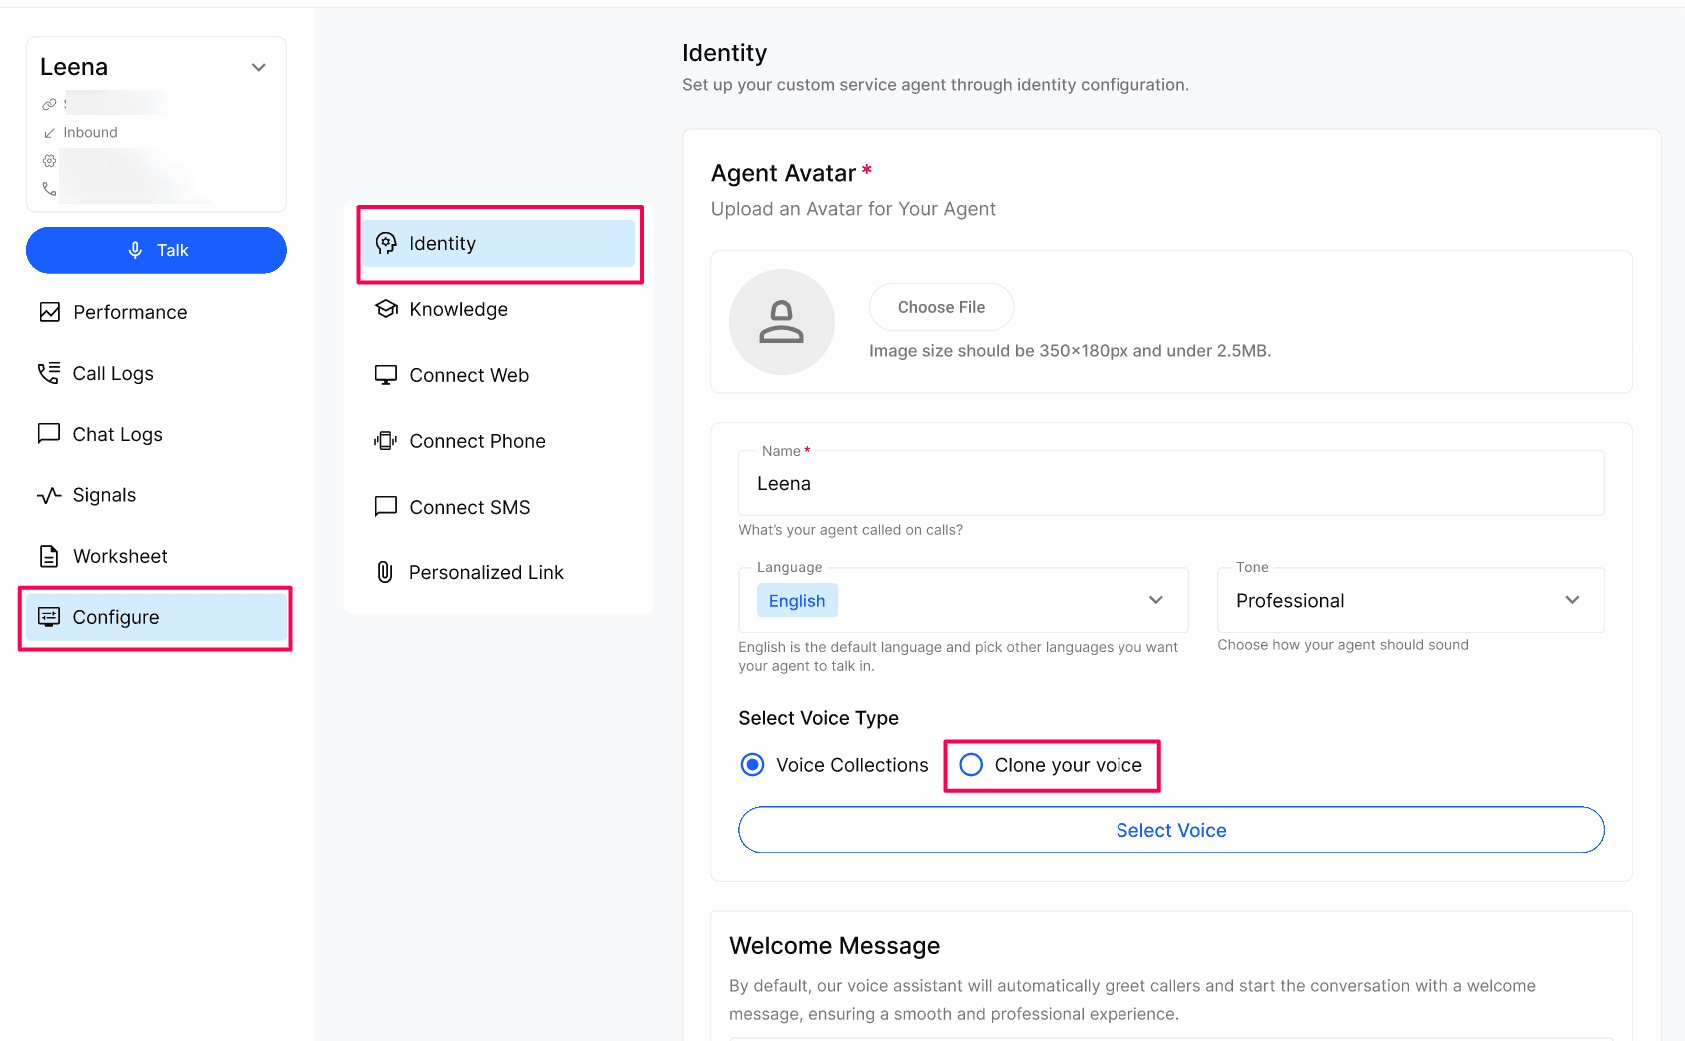
Under Select Voice, choose Clone Voice, then select Add New.
The Clone Your Voice dialog offers Upload and Record. Choose one method below.
Option 1: Upload an audio sample
Select Upload in Clone Your Voice.
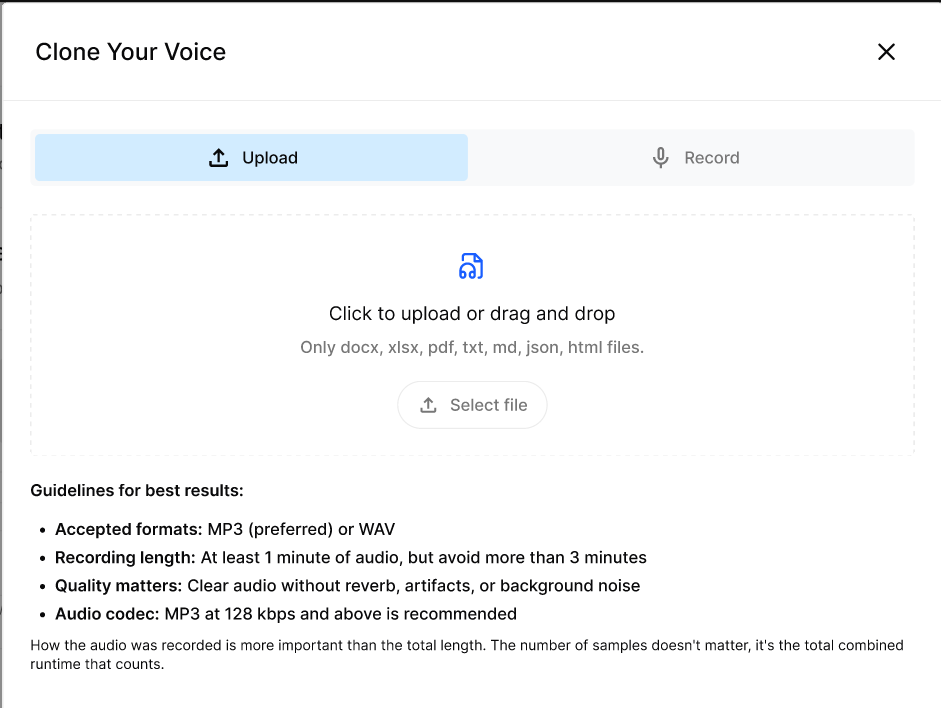
Drag your audio file into the upload area, or select Select file and browse to the file.
In Add Voice Details, enter a recognizable Voice Name and select Language and Gender.
Audio guidelines for uploads
Option 2: Record your voice
Select Record in Clone Your Voice.
Select Start Recording. Speak about anything, such as Talk about your favorite city., or read the passage under Or Read along.
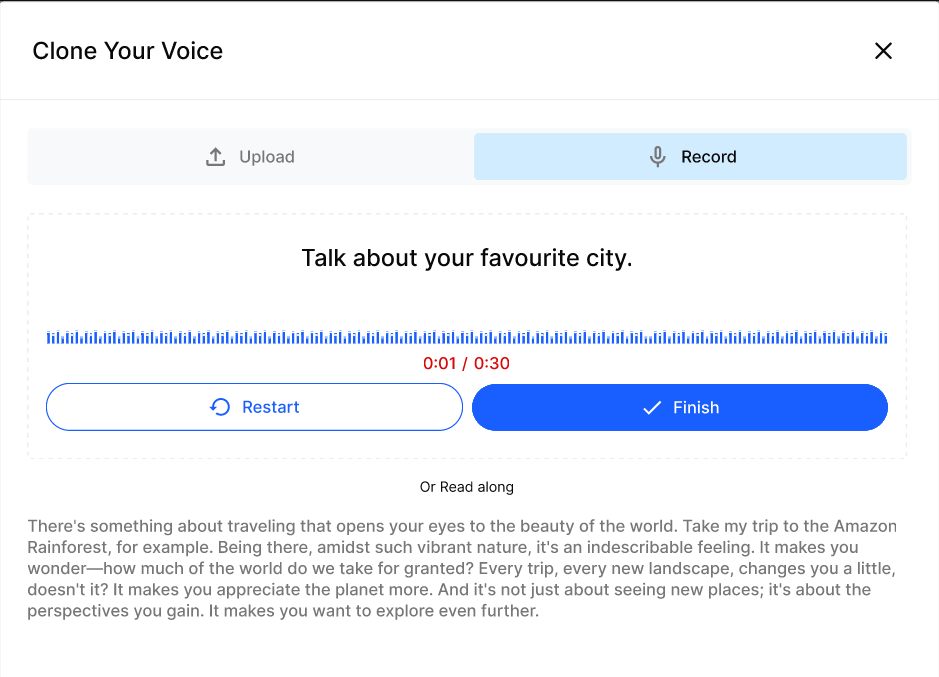
Watch the waveform and elapsed timer. Select Restart if you need another take, or Finish to complete the recording.
In Add Voice Details, enter a recognizable Voice Name and select Language and Gender.
Select Submit.
Configuration reference
Select the voice and verify the result
Return to Configure → Identity and review Select Voice → Clone Voice.
Open the Voice dropdown. Look for the name you submitted and select it when available.
Reopen Identity and check that the intended voice remains selected.
Run a controlled voice test with the Agent before using the change for live calls. Listen to the greeting and a short exchange for clarity and the intended voice.
Expected result: The intended cloned voice is visible and selected in the Voice dropdown, and your test confirms the Agent uses the intended voice.
Troubleshooting
Frequently Asked Questions
Can I upload audio instead of recording in the portal?
Can I upload audio instead of recording in the portal?
Yes. Clone Your Voice offers both Upload and Record. Upload accepts MP3 (preferred) or WAV.
How long should my uploaded sample be?
How long should my uploaded sample be?
At least 1 minute and to avoid more than 3 minutes. It also emphasizes clear audio over total length. These recommendations do not establish enforced limits.
Which voice details are required?
Which voice details are required?
Voice Name, Language and Gender are marked required in Add Voice Details. Complete them before selecting Submit.
Does submitting a cloned voice automatically assign it to my Agent?
Does submitting a cloned voice automatically assign it to my Agent?
Do not assume it does. Return to Identity, choose Clone Voice and check the Voice dropdown for the intended selection.
Related articles
Was this helpful?
Still need help? Ask the team