Connect Web — Embed, Style and Test Your AI Agent on your website
Written By Maruf Ansari
Last updated 2 days ago
Add your AI Agent to your website as a chat or voice widget, then match its colours and placement to your site. This guide covers copying the Embed Code, configuring Customise Styling, saving the Agent and testing the published widget.
Connect Web Overview
Connect Web allows Business users to add an AI Agent to their website through an embedded chat and voice widget. You can copy the selected Agent's Embed Code, add it to your website's <head> section, and customise the widget's button color, icon color, screen position, and spacing.
The widget uses the Agent's configured identity, conversation flow, and connected Knowledge Bases. After saving the configuration, you can verify that both Chat and Voice work correctly on your published website.
Website installation may require assistance from a site administrator or web developer.
Copy and install the Embed Code
Open Configure → Connect Web on the agent you want to embed. Under Connect Agent to website you'll see a ready-to-use script. Click Copy Code.
The YOUR_AGENT_ID value in the script is unique to this agent — do not change it.
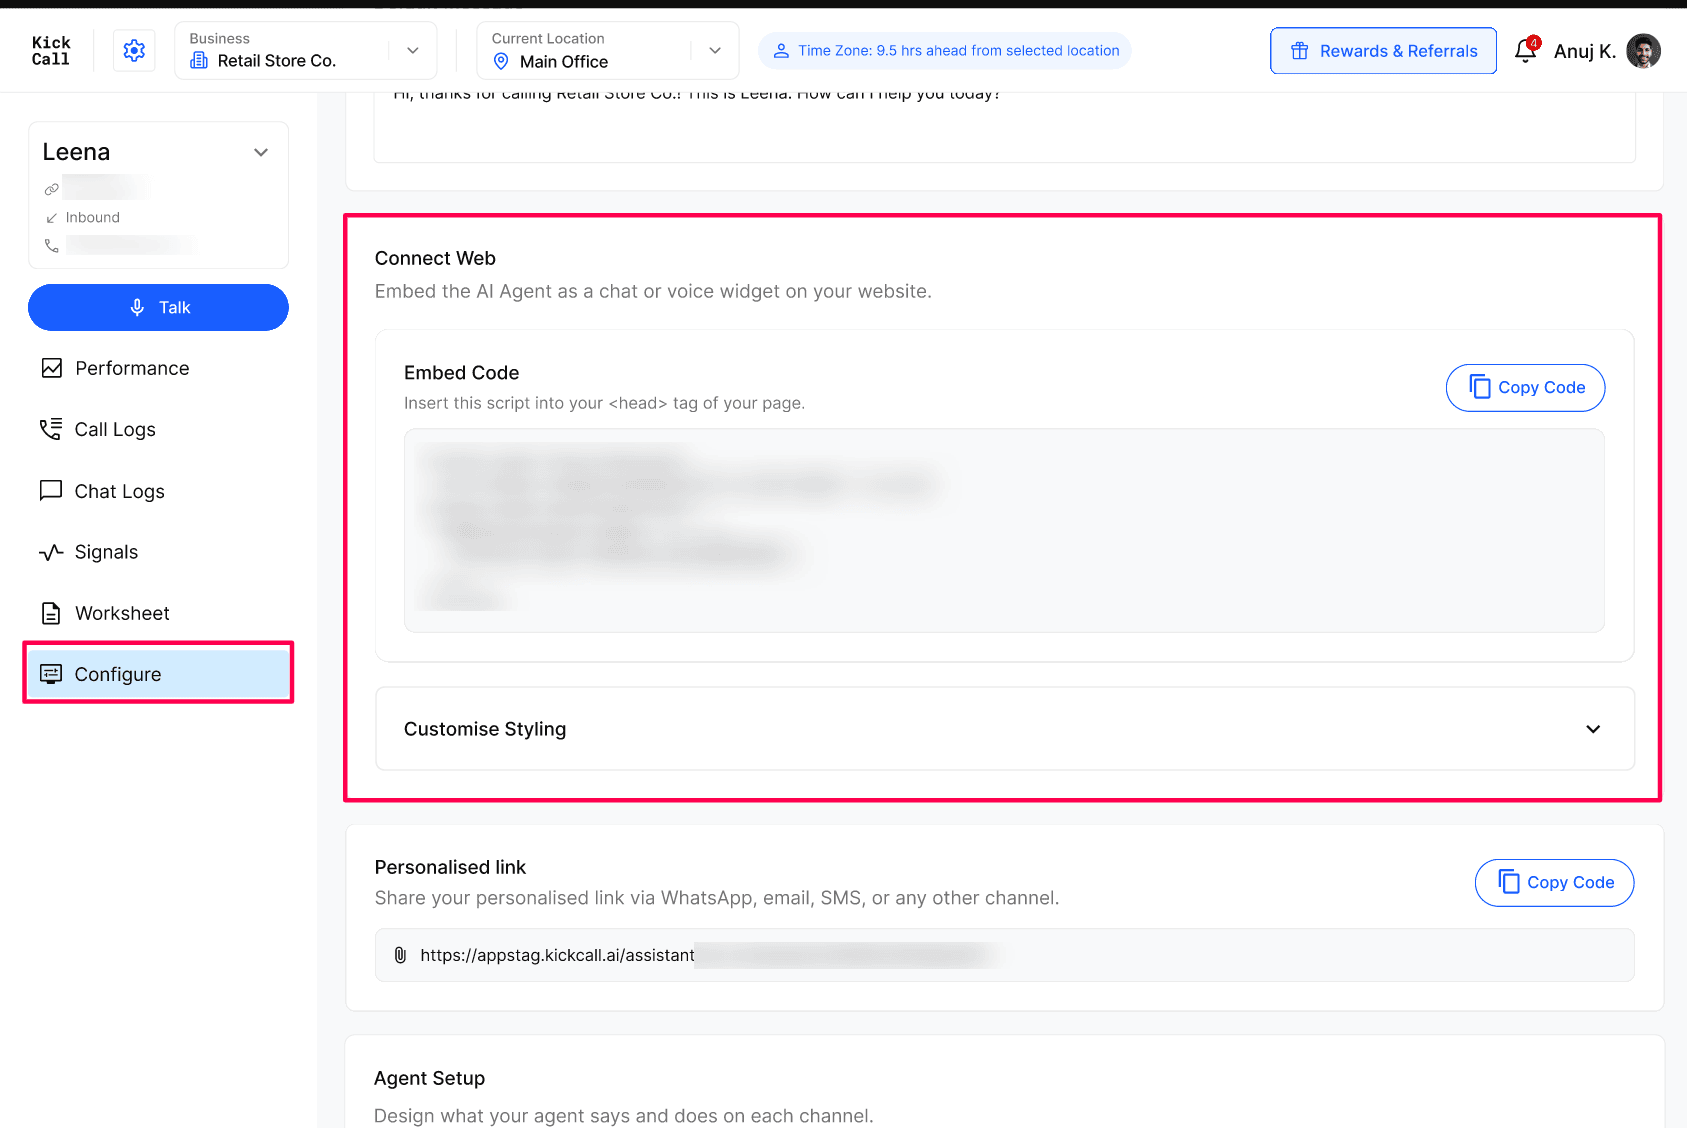
Paste the script inside the <head> tag of every page where you want the widget to appear. Most website builders (WordPress, Webflow, Shopify, Wix, custom sites) have a "Custom code in head" or "Header scripts" setting for exactly this.
Once saved and published, the widget appears in the corner of your site:
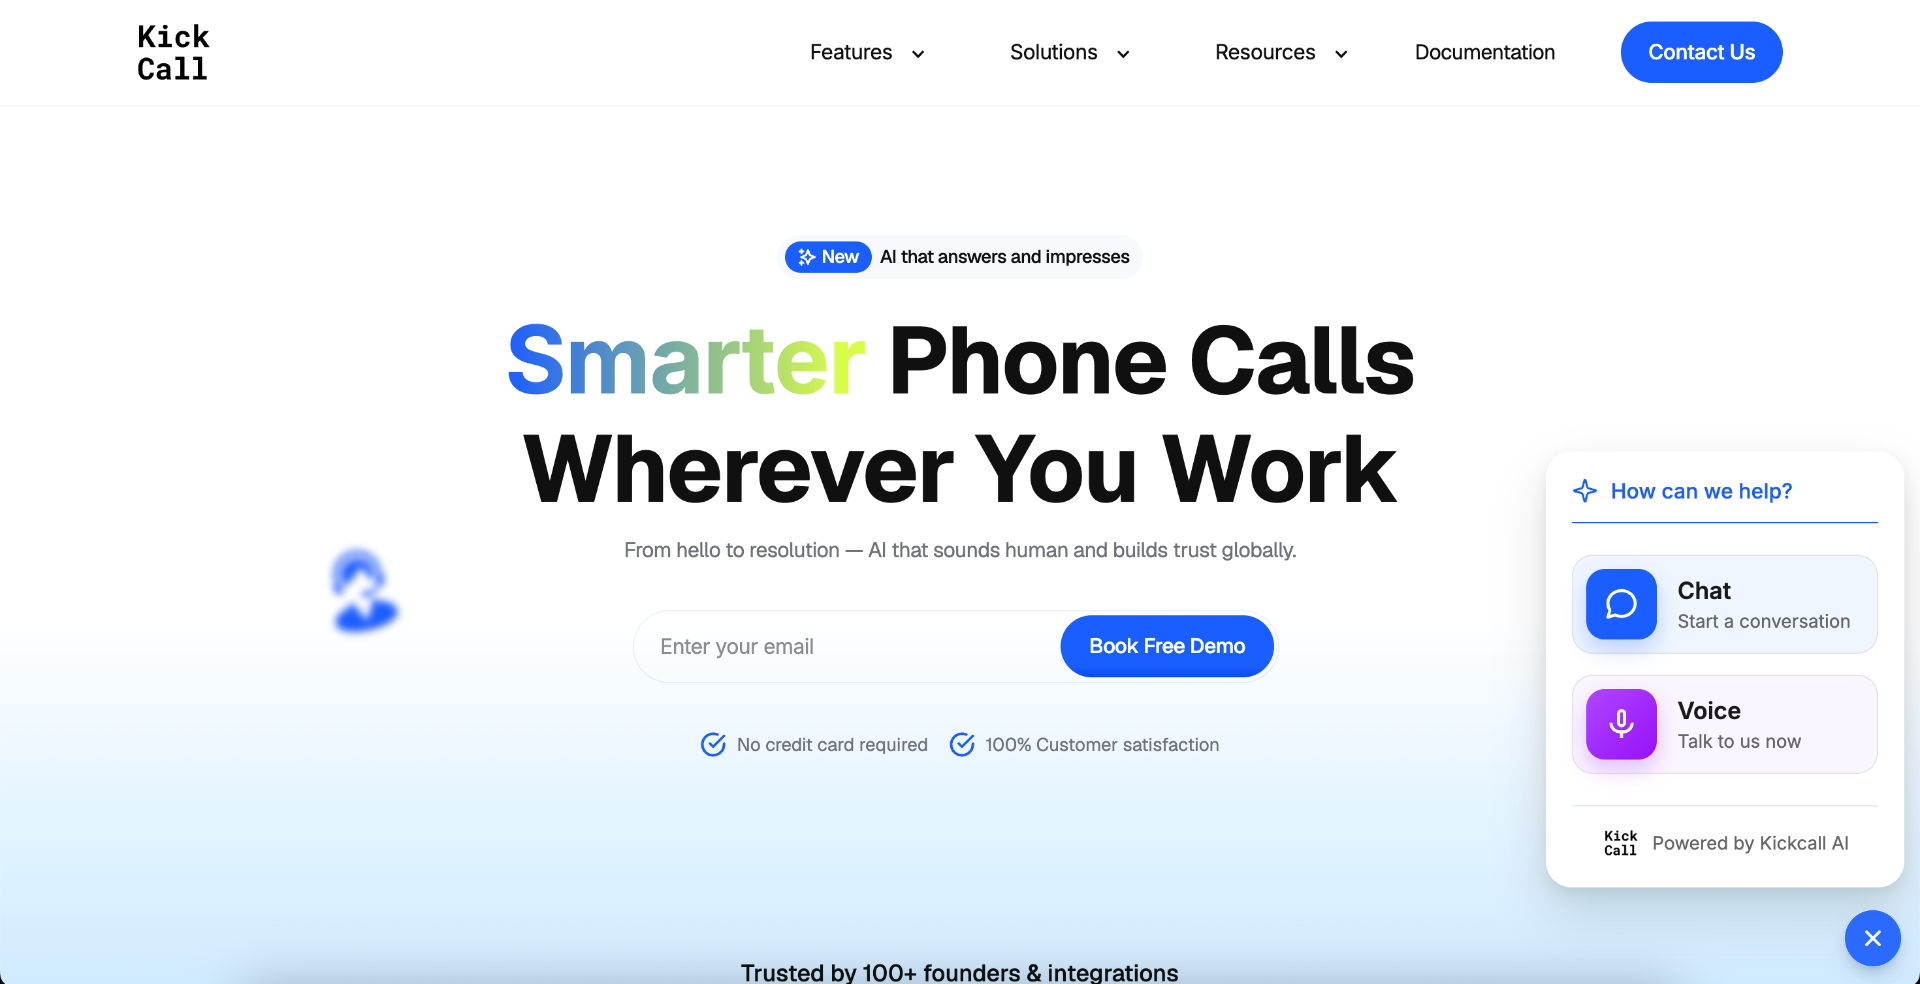
Visitors can:
Chat — start a text conversation with the agent.
Voice — talk to the agent in real time, just like a phone call.
Customise the widget styling
Expand Customise Styling below Connect Web.
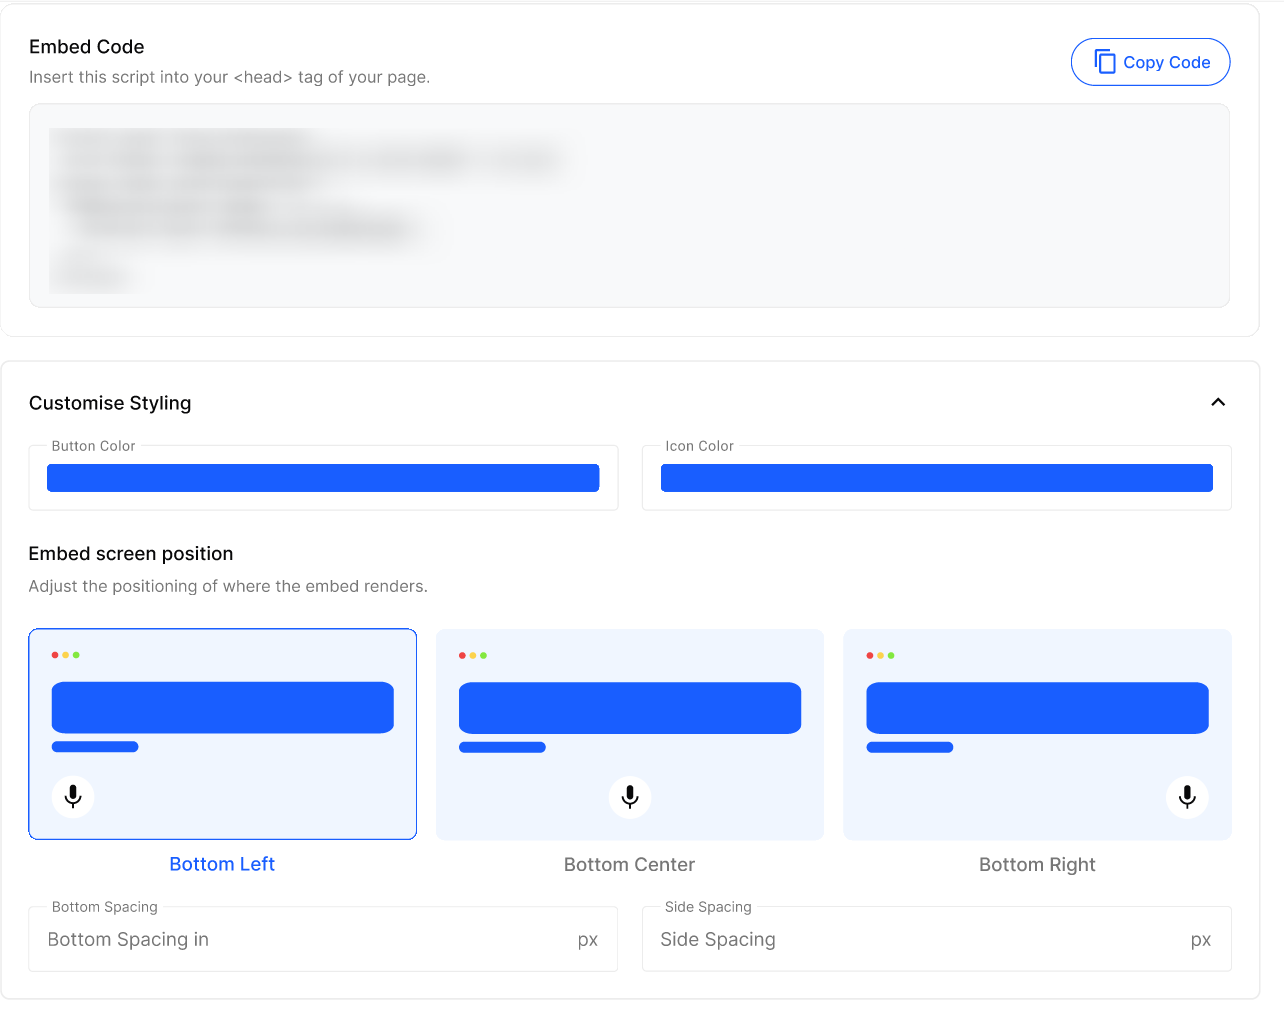
Set Button Color and Icon Color. Check that the icon remains easy to see against the button.
Under Embed screen position, choose Bottom Left, Bottom Center or Bottom Right.
Enter Bottom Spacing and Side Spacing in pixels to separate the widget from the page edges or nearby controls.
Select Save on the Configure page, then reload your published website and review the result.
Expected result
The widget appears at the selected bottom position with the configured colours and spacing. Visitors can open the available Chat or Voice experience for the selected Agent.
Verify the result
Open the published website in a new browser window and confirm the widget's position, colours and spacing.
Send a test question through Chat and check the answer against the connected Knowledge Base.
Start a Voice test and confirm the Agent uses the intended voice and greeting.
Review the resulting Chat Logs and Call Logs for the test conversations.
Troubleshooting
Recovery or rollback
To remove the widget, delete its script from the website's <head> and publish the site. To switch Agents, replace the script with the intended Agent's Embed Code. To correct styling, restore the previous colours, position and spacing manually and select Save.
Frequently Asked Questions
Do I need a developer to install this?
Do I need a developer to install this?
Usually no. Almost every website builder has a setting for adding custom code to the <head>. If you're on a fully custom site, any developer can paste it in a couple of minutes.
Will the widget work on every page of my site?
Will the widget work on every page of my site?
Yes, as long as the script is in the site-wide <head>. If you paste it on a single page only, it will appear only on that page.
Can I change the agent later without editing my website?
Can I change the agent later without editing my website?
The script is bound to one agent via its ID. If you want to swap to a different agent, copy the new agent's script from its Connect Web tab and replace the one in your <head>.
Does changing styling or position require re-pasting the script?
Does changing styling or position require re-pasting the script?
No. Styling and position changes take effect automatically — the script always loads the latest configuration.
Will the widget answer using this agent's knowledge?
Will the widget answer using this agent's knowledge?
Yes. Conversations from the web widget use the same identity, voice and Knowledge Base you've configured for this agent — so test it from the Knowledge module before going live.
Does it support both chat and voice?
Does it support both chat and voice?
Yes. Visitors choose Chat for text or Voice to talk to the agent live, right inside the widget.
Related articles
Was this helpful?
Still need help? Ask the team